
Sunday, as a prelude to the big day, Brian hosted a Shoebox Swap. For a Shoebox Swap each participant designs a card and assembles all the necessary cardstock, ink, tools and accessories needed to make the card. The items are then put in a shoebox and brought to the swap. Each shoebox is set-up at a station and the participants go from station to station assembling cards.
For my card I wanted to use only products that would remain in the catalog and ideally include some new products. Fortunately Stampin' Up! included in the free Sale-a-bration offerings a couple of new products that will be included in the upcoming catalog. One was the banner punch and the other was the Decorative Dots embossing folder. I first created a card using both of these items but finally had to give up the Decorative Dots and accept that the Chevron embossing folder worked so much better with the banners.

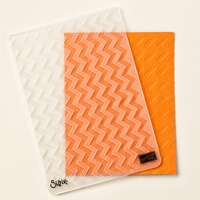
To easily align the banners along the edge of the card base I I adhered them down a narrow strip of white card stock. I then adhered that strip to right side of the card base. Since I really felt the card should be vertical, the Chevron folder, as basically a horizontal folder, was not an easy fit. It would not be the first time I have changed the orientation of an embossing folder (see here) and I thought doing so again would produce a good result. I embossed two pieces of Blushing Bride and cut them to fit the card making one about twice as long as the other. At the seam I placed a thin strip of Soft Suede that had been cut on each side with one of the Finishing Touches Edgelit Dies.
The Swap was great fun and there were some really great cards. I had a picture taken of me with my card before the swap began but I got so caught up in making the other cards I totally forgot to take pictures of the other participants!! I do have the cards I made and will be posting pictures of some of them in the future. I also hope to take pictures at the theater event. While I can't show pictures from the inside of the catalog I can show you the catalog cover, tell you about some of the new products and take pictures of the fun people! If my technology skills are at their prime I may try to post some pictures from the event on Facebook Monday night. Otherwise I hope to post some on Tuesday. You can view my FB page by clicking on the Facebook badge at the top right-hand column of this post.
To order click on the ordering tab above just under the header. You can email me privately with any of your papercrafting questions or ask them in a comment below!
Supplies Used
- Stamp Sets: Blue Ribbon (131964 W, 125981 C), Chalk Talk (130631 W, 130634 C, 134800 MDS)
- Cardstock: Soft Suede (115318), Blushing Bride (131198), Champagne Glimmer Paper (127885), Naturals Ivory (101849)
- Ink: Soft Suede (126978), Versamark (102193)
- Tools: Banner Punch (133519 not available until June 1), Chevron Embossing Folder ( 127749), 2 3/8" Scallop Punch (118874), 1 3/8 Circle Punch (119860), Finishing Touches Edgelit (127010)


No comments:
Post a Comment
Thank you for taking the time to comment. I read all comments and respond to any questions.
Katie