Tuesday, August 26, 2014

August Paper Pumpkin


I just received my August Paper Pumpkin and here is what I found in the cute little box! Yay!! 


There are four standard sized card bases in fun stripes with supplies to make colored envelopes tied with linen thread to match. In addition there are four 2.25" X 3.25" enclosure cards with similar matching envelopes. Plus you get the following items to complete your cards:


  • 16 banners for stamping and use on all the cards. 
  • Small bag of pink sequins
  • Small bag of silver brads
  • 3 yards of linen thread
  • A sheet of Stampin' Dimensionals 
  • A sheet of Glue Dots
  • Hello Honey stampin' spot
  • Seriously Amazing photopolymer stamp set 


Each month Stampin' Up! prepares a video on the new Pumpkin Kit. Here is this month's video.


If you are a new subscriber from now until September 10 when you use the code HALFOFF2 to join Paper Pumpkin you will get 50% of your first two months. After that you will receive a kit each month for $19.95 + tax. At any time you can put your next monthly kit on hold. In addition, as long as you are a subscriber, you can order any available past kits and refills (refills to not include stamps or ink). Click here to see what kits and refills are currently available. 

Each Tuesday Stampin' Up! announces a new collection of Weekly Deals which are 25% off. Here are the new deals for this week. They are good until the end of the day Monday September 1.


To order click on the ordering tab above just under the header. You can email me privately with any of your papercrafting questions or ask them in a comment below!


 I comments and would love to hear what you think!!  Leave your thoughts below!

Tuesday, August 19, 2014

Weekly Deals


Save 25% on this week's Weekly Deals. Prices are in effect now through August 25. The sleeper in this group are the Finishing Touches Edgelits Die. The scallopy edging really looks great on cards but the zig-zag edging is the one you might miss. It is really fun to use with the Chevron embossing folder, the Starburst Sayings stamp set or the Starburst Framelits.   


To order click on the ordering tab above just under the header. You can email me privately with any of your papercrafting questions or ask them in a comment below!


 I ♥ comments and would love to hear what you think!!  Leave your thoughts below!

Tuesday, August 12, 2014

PALS August Blog Hop: Fringe Flowers


Welcome to the Pals Blog Hop for August. This month we are showing off our favorite crafting tools - those Stampin' Up! tools that we just can't live without. We hope you enjoy our projects!

You may just be starting the blog hop or may have come from Dawn Tidd at Tiddbits from Dawn (#36) on the Pals Hop. If you get off track at any time, the full lineup below will help you move along from blog to blog so you see all of the amazing creations.

We all have many tools available when we are papercrafting. Sometimes, like a heat tool, they do things we would have great difficulty doing if we did not have them. Other times, with tools like fringe scissors and Framelits they just make things easier. I bought the fringe scissors early last spring when they first became available but I have never used them. For this blog post I challenged myself to use these scissors to make a flower for a card. Here is the card I made. 


I have been interested in making paper flowers since last spring when the cover of the Stampin' Up! demonstrator magazine contained a collection of gorgeous paper flowers! A few of them were made with cardstock and others with filter paper. I was very intrigued and wanted to attempt it myself. After watching the video Stampin' Up! produced on various ways to make flowers I gave it a try. I was surprised at how easy it was. I made mine like the last example Shannon showed in the video. I used filter paper and a scallop punch. I spritzed a few of the finished flowers with reinker and water and for others put the diluted color in a bowl and immersed the punched filter paper pieces before I assembled the flowers. I took three of the resulting flowers and made a corsage which I thought was a perfect accessory to wear to the demonstrator catalog launch event that Stampin' Up! held last April in theaters all over the country! While my corsage was fun to wear that night when I was surrounded by fellow demonstrators, the flowers would also be wonderful for home decor and on all kinds of gift packaging!

For the flower I used on today's card I adapted the instructions for the Pom-Pom shown in this Stampin' Up! video. I used a 12"x 1.5" strip of Typeset Specialty DSP that I folded in half as done in the video. Since this specialty DSP is ultralight to look and feel like it came from a vintage book I adhered the open edges of the folded piece together with a thin strip of adhesive tape that I folded over. I then fringed the strip with my fringe scissors. Using Sticky Strip I wrapped the fringed strip around a button center. Once it was completed I opened up the "flower" with my fingers and then gently pressed the center open with the palm of my hand.

These flowers can be made in a variety of sizes and with all kinds of paper and cardstock. They are perfect to go on gift boxes. I am already thinking about the different kinds I can make for holiday gifts!

Here I am wearing my corsage outside the Catalog Launch theater with my Upline Brian King.


Supplies Used:

Stamp Set: Itty Bitty Banners (clear 126257 - wood 132022) 

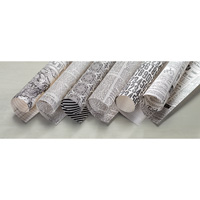
Cardstock and DSP: Crushed Curry (131199); Soft Sky (131203); Basic Black (121045); Flashback (133699); Typeset Specialty (133704) 

Ink:  Tuxedo Black (132708)

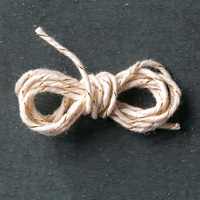
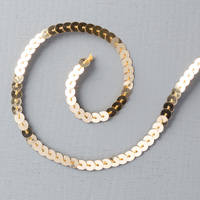
Accessories: Very Vintage Buttons (129327); Gold Baker's Twine (132975); Gold Sequin Trim (132983); 

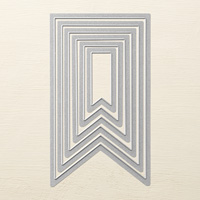
Tools: Bitty Banners Framelits (129267); Banners Framelits (132173); Fringe Scissors (133325)

To order click on the ordering tab above just under the header. You can email me privately with any of your papercrafting questions or ask them in a comment below!

 I ♥ comments and would love to hear what you think!!  Leave your thoughts below! (FYI in order to prevent spam there will be a delay in your comment appearing below.)

The next stop on the Pals Blog Hop is Liz Gautreaux at Kind Deeds Stampin! (#38).  Thanks for visiting and  I hope to see you next month.

2014aughop_back 2014aughop_next


  1. Sue Becker at RnR Stamping
  2. Beth Beard at My Little Craft Blog
  3. Susan Lankford at Stamp and Create With Susan 
  4. Brian King at Stamp with Brian 
  5. Rae Harper-Burnet at WildWestPaperArts.com
  6. Debbie Mageed at Secret Stamper 
  7. Diane Roberts at Score at Four and a Quarter 
  8. Jackie Diediker at Stampin' Jackie
  9. Kelly DeTommaso at Kelly's Creative Corner 
  10. Amanda Merrill at Inkflair
  11. Shannon Hokanson at Paper Works by Shannon 
  12. Amy Williams at Stamp and Spice
  13. Kerry Willard Bray at Peonies and Paper Chains
  14. Michelle Gleeson at Stampin' Mojo
  15. Nicole Watt at Pixel Maven's Retreat
  16. Peggy Noe at Pretty Paper Cards
  17. September Gray at SeptemberGray.com 
  18. Shannon Jaramillo at EZPeasy Cards 
  19. Natalie Bradley at Natalie Bradley Events
  20. Susan Itell at Simple Stampin 
  21. Wendy Klein at Doggone Delightful Stampin' 
  22. Lynn Kolcun at Stamping with Avery's Owlery 
  23. Nancy Gleason at My Stampin Space
  24. Sherrie Gross at Stampin' Sunshine
  25. Becky Gifford at The Social Stamper
  26. Kalyn Shubnell at The Stamping Chronicles
  27. Lisa Ann Bernard at Queen B Creatons 
  28. Martie Pollard at The Crafty Bandit
  29. Amy Hoptay at Inking of You!
  30. Kim Jolley at Stampin' Artfully 
  31. Donna Kopenski at craftycardmaker.wordpress.com
  32. Katy McGloin at Just Fun Stamping 
  33. Maggie Mata at Maggie Made Cards 
  34. Jane Knudsen at www.seejanestamp.com 
  35. Candy Ford at Candy's Blog 
  36. Dawn Tidd at Tiddbits from Dawn 
  37. Katie Ferguson at Cottage Paper 
  38. Liz Gautreaux at Kind Deeds Stampin 
  39. Mary Fish at Stampin' Pretty           

Monday, August 4, 2014

Works of Art


This past weekend a few of us got together at our local coffee shop/art gallery to make cards. We decided to make two cards - I designed one of the cards and fellow demonstrator Imogene Thomas designed the other. Since our group included two people who had never before put stamp to ink we wanted our cards to be easy and yet striking.

The Work of Art set is perfect for this task! The stamped images resemble swooshes of watercolor. No matter how they are arranged they look wonderful when placed on cardstock. I have seen them used in many ways and they are always fantastic! Here is the card I designed for them.


Our beginners had no trouble with the images and were even comfortable with the stamping off technique that we used. Attaching a couple of more layers was a simple way to add some additional class to the card.

Although we didn't plan our cards together Imogene's card followed a similar theme. We even used two of the same colors - Wild Wasabi and Marina Mist. Her card used the masking technique to create a serene scene with the Kinda Eclectic stamp set. Here is her card.


Here are the stampers in action!!


 I think everyone was pleased with the "works of art" we produced!


Supplies Used:

Stamp Set: Work of Art (134114 clear - 134111 wood); Kinda Eclectic (135347 clear - 135350 wood)
Cardstock: Baked Brown Sugar (131296): Very Vanilla (101650); Brushed Gold (102935); Hello Honey (133678); Whisper White (100730)
Ink: Wild Wasabi (126959); So Saffron (126957); Marina Mist (126962); Basic Gray (126981); Memento Black (132708)  
Accessories: Marina Mist Cotton Ribbon (134561)
Tools: Itty Bitty Accents Punch Pack (133787); Stamping Sponges (101610)

To order click on the ordering tab above just under the header. You can email me privately with any of your papercrafting questions or ask them in a comment below!
 I ♥ comments and would love to hear what you think!!  Leave your thoughts below!