Tuesday, August 26, 2014

August Paper Pumpkin


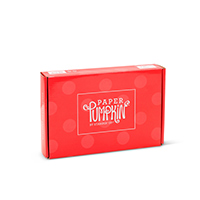
I just received my August Paper Pumpkin and here is what I found in the cute little box! Yay!! 


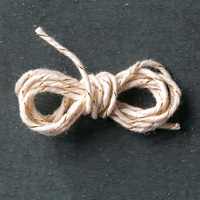
There are four standard sized card bases in fun stripes with supplies to make colored envelopes tied with linen thread to match. In addition there are four 2.25" X 3.25" enclosure cards with similar matching envelopes. Plus you get the following items to complete your cards:


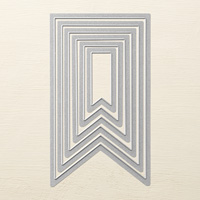
  • 16 banners for stamping and use on all the cards. 
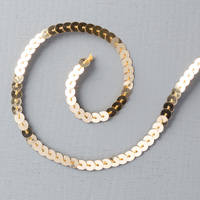
  • Small bag of pink sequins
  • Small bag of silver brads
  • 3 yards of linen thread
  • A sheet of Stampin' Dimensionals 
  • A sheet of Glue Dots
  • A Hello Honey stampin' spot
  • Seriously Amazing photopolymer stamp set 


Each month Stampin' Up! prepares a video on the new Pumpkin Kit. Here is this month's video.


If you are a new subscriber from now until September 10 when you use the code HALFOFF2 to join Paper Pumpkin you will get 50% of your first two months. After that you will receive a kit each month for $19.95 + tax. At any time you can put your next monthly kit on hold. In addition, as long as you are a subscriber, you can order any available past kits and refills (refills to not include stamps or ink). Click here to see what kits and refills are currently available. 

Each Tuesday Stampin' Up! announces a new collection of Weekly Deals which are 25% off. Here are the new deals for this week. They are good until the end of the day Monday September 1.


To order click on the ordering tab above just under the header. You can email me privately with any of your papercrafting questions or ask them in a comment below!


 I ♥ comments and would love to hear what you think!!  Leave your thoughts below!

Tuesday, August 19, 2014

Weekly Deals


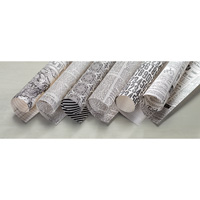
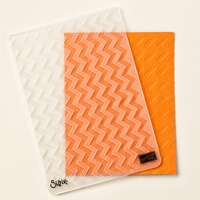
Save 25% on this week's Weekly Deals. Prices are in effect now through August 25. The sleeper in this group are the Finishing Touches Edgelits Die. The scallopy edging really looks great on cards but the zig-zag edging is the one you might miss. It is really fun to use with the Chevron embossing folder, the Starburst Sayings stamp set or the Starburst Framelits.   


To order click on the ordering tab above just under the header. You can email me privately with any of your papercrafting questions or ask them in a comment below!


 I ♥ comments and would love to hear what you think!!  Leave your thoughts below!

Tuesday, August 12, 2014

PALS August Blog Hop: Fringe Flowers


Welcome to the Pals Blog Hop for August. This month we are showing off our favorite crafting tools - those Stampin' Up! tools that we just can't live without. We hope you enjoy our projects!

You may just be starting the blog hop or may have come from Dawn Tidd at Tiddbits from Dawn (#36) on the Pals Hop. If you get off track at any time, the full lineup below will help you move along from blog to blog so you see all of the amazing creations.

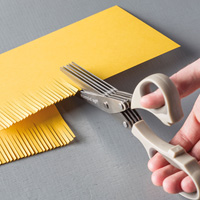
We all have many tools available when we are papercrafting. Sometimes, like a heat tool, they do things we would have great difficulty doing if we did not have them. Other times, with tools like fringe scissors and Framelits they just make things easier. I bought the fringe scissors early last spring when they first became available but I have never used them. For this blog post I challenged myself to use these scissors to make a flower for a card. Here is the card I made. 


I have been interested in making paper flowers since last spring when the cover of the Stampin' Up! demonstrator magazine contained a collection of gorgeous paper flowers! A few of them were made with cardstock and others with filter paper. I was very intrigued and wanted to attempt it myself. After watching the video Stampin' Up! produced on various ways to make flowers I gave it a try. I was surprised at how easy it was. I made mine like the last example Shannon showed in the video. I used filter paper and a scallop punch. I spritzed a few of the finished flowers with reinker and water and for others put the diluted color in a bowl and immersed the punched filter paper pieces before I assembled the flowers. I took three of the resulting flowers and made a corsage which I thought was a perfect accessory to wear to the demonstrator catalog launch event that Stampin' Up! held last April in theaters all over the country! While my corsage was fun to wear that night when I was surrounded by fellow demonstrators, the flowers would also be wonderful for home decor and on all kinds of gift packaging!

For the flower I used on today's card I adapted the instructions for the Pom-Pom shown in this Stampin' Up! video. I used a 12"x 1.5" strip of Typeset Specialty DSP that I folded in half as done in the video. Since this specialty DSP is ultralight to look and feel like it came from a vintage book I adhered the open edges of the folded piece together with a thin strip of adhesive tape that I folded over. I then fringed the strip with my fringe scissors. Using Sticky Strip I wrapped the fringed strip around a button center. Once it was completed I opened up the "flower" with my fingers and then gently pressed the center open with the palm of my hand.

These flowers can be made in a variety of sizes and with all kinds of paper and cardstock. They are perfect to go on gift boxes. I am already thinking about the different kinds I can make for holiday gifts!

Here I am wearing my corsage outside the Catalog Launch theater with my Upline Brian King.


Supplies Used:

Stamp Set: Itty Bitty Banners (clear 126257 - wood 132022) 

Cardstock and DSP: Crushed Curry (131199); Soft Sky (131203); Basic Black (121045); Flashback (133699); Typeset Specialty (133704) 

Ink:  Tuxedo Black (132708)

Accessories: Very Vintage Buttons (129327); Gold Baker's Twine (132975); Gold Sequin Trim (132983); 

Tools: Bitty Banners Framelits (129267); Banners Framelits (132173); Fringe Scissors (133325)

To order click on the ordering tab above just under the header. You can email me privately with any of your papercrafting questions or ask them in a comment below!

 I ♥ comments and would love to hear what you think!!  Leave your thoughts below! (FYI in order to prevent spam there will be a delay in your comment appearing below.)

The next stop on the Pals Blog Hop is Liz Gautreaux at Kind Deeds Stampin! (#38).  Thanks for visiting and  I hope to see you next month.

2014aughop_back 2014aughop_next


  1. Sue Becker at RnR Stamping
  2. Beth Beard at My Little Craft Blog
  3. Susan Lankford at Stamp and Create With Susan 
  4. Brian King at Stamp with Brian 
  5. Rae Harper-Burnet at WildWestPaperArts.com
  6. Debbie Mageed at Secret Stamper 
  7. Diane Roberts at Score at Four and a Quarter 
  8. Jackie Diediker at Stampin' Jackie
  9. Kelly DeTommaso at Kelly's Creative Corner 
  10. Amanda Merrill at Inkflair
  11. Shannon Hokanson at Paper Works by Shannon 
  12. Amy Williams at Stamp and Spice
  13. Kerry Willard Bray at Peonies and Paper Chains
  14. Michelle Gleeson at Stampin' Mojo
  15. Nicole Watt at Pixel Maven's Retreat
  16. Peggy Noe at Pretty Paper Cards
  17. September Gray at SeptemberGray.com 
  18. Shannon Jaramillo at EZPeasy Cards 
  19. Natalie Bradley at Natalie Bradley Events
  20. Susan Itell at Simple Stampin 
  21. Wendy Klein at Doggone Delightful Stampin' 
  22. Lynn Kolcun at Stamping with Avery's Owlery 
  23. Nancy Gleason at My Stampin Space
  24. Sherrie Gross at Stampin' Sunshine
  25. Becky Gifford at The Social Stamper
  26. Kalyn Shubnell at The Stamping Chronicles
  27. Lisa Ann Bernard at Queen B Creatons 
  28. Martie Pollard at The Crafty Bandit
  29. Amy Hoptay at Inking of You!
  30. Kim Jolley at Stampin' Artfully 
  31. Donna Kopenski at craftycardmaker.wordpress.com
  32. Katy McGloin at Just Fun Stamping 
  33. Maggie Mata at Maggie Made Cards 
  34. Jane Knudsen at www.seejanestamp.com 
  35. Candy Ford at Candy's Blog 
  36. Dawn Tidd at Tiddbits from Dawn 
  37. Katie Ferguson at Cottage Paper 
  38. Liz Gautreaux at Kind Deeds Stampin 
  39. Mary Fish at Stampin' Pretty           

Monday, August 4, 2014

Works of Art


This past weekend a few of us got together at our local coffee shop/art gallery to make cards. We decided to make two cards - I designed one of the cards and fellow demonstrator Imogene Thomas designed the other. Since our group included two people who had never before put stamp to ink we wanted our cards to be easy and yet striking.

The Work of Art set is perfect for this task! The stamped images resemble swooshes of watercolor. No matter how they are arranged they look wonderful when placed on cardstock. I have seen them used in many ways and they are always fantastic! Here is the card I designed for them.


Our beginners had no trouble with the images and were even comfortable with the stamping off technique that we used. Attaching a couple of more layers was a simple way to add some additional class to the card.

Although we didn't plan our cards together Imogene's card followed a similar theme. We even used two of the same colors - Wild Wasabi and Marina Mist. Her card used the masking technique to create a serene scene with the Kinda Eclectic stamp set. Here is her card.


Here are the stampers in action!!


 I think everyone was pleased with the "works of art" we produced!


Supplies Used:

Stamp Set: Work of Art (134114 clear - 134111 wood); Kinda Eclectic (135347 clear - 135350 wood)
Cardstock: Baked Brown Sugar (131296): Very Vanilla (101650); Brushed Gold (102935); Hello Honey (133678); Whisper White (100730)
Ink: Wild Wasabi (126959); So Saffron (126957); Marina Mist (126962); Basic Gray (126981); Memento Black (132708)  
Accessories: Marina Mist Cotton Ribbon (134561)
Tools: Itty Bitty Accents Punch Pack (133787); Stamping Sponges (101610)

To order click on the ordering tab above just under the header. You can email me privately with any of your papercrafting questions or ask them in a comment below!
 I ♥ comments and would love to hear what you think!!  Leave your thoughts below!


Monday, July 21, 2014

Project Room Invasion

This past weekend I had some out-of-state visitors who all ended up invading my tiny project room. What a really fun time we had! 

First we experimented with the new Stampin’ Up! Blendabilities. Beginning August 1 all the Blendability assortments (see page 212 of the annual catalog) will be available to order. Until then Cherry Cobbler, Coastal Cabana, Daffodil Delight, Old Olive, Pumpkin Pie, Rich Razzleberry, and the Skin Tone Assortment are all available. While there is a bit of a learning curve with Blendabilites Stampin’ Up! has posted several videos (https://www.youtube.com/user/stampinupvideo/search?query=blendabilities) showing Bendability techniques. One of the Blendability experimenters at my house used Cherry Cobbler to color the Blended Bloom image. I thought she did a really good job for a first time user and she didn't even watch any videos! Here is her finished image.


​​
Don’t think I mentioned that she is 10 years old. (While she would protest that she is “almost 11”, since she still has 2 months to go, I am sticking with 10!)

Another of my visitors became very interested in My Paper Pumpkin. She assembled several kits I had on hand and took another one home with her. She mentioned that she would like a subscription. Since she has a birthday coming up and Stampin’ Up! has a great Pumpkin promotion going on right now (sign up by September 10 and get 50% off your first two monthly kits) I am considering giving her one as a gift. BTW she is almost 13 (really!).  


Here are a few of my visitors in action!


To order click on the ordering tab above, just under the header. You can email me privately with any of your papercrafting questions or ask them in a comment below!


I ♥ comments and would love to hear what you think!! You can leave your thoughts below!!


Thursday, July 3, 2014

Celebrate the 4th!

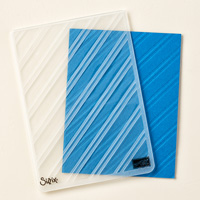
The June My Paper Pumpkin kit has a bit of a patriotic theme. (See video link below) It includes red, white and blue pinwheels that can be attached to red and white striped heavy paper straws.  After assembling the pinwheels I decided to create a card with a similar theme and the Stylish Stripes embossing folder seemed a perfect choice. I really love this folder. It was introduced in last fall's Holiday Mini and I was very excited when it reappeared in the new annual catalog! I love to put skinny strips of glimmer paper in some of the grooves created by the folder. The resulting piece makes a great layer to use on cards that can be used for all kinds of festive occasions. Here is the card I made.


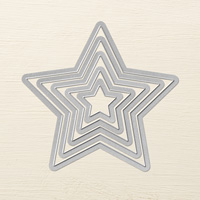
You might notice that I used three different embossing folders! In addition to the Stylish Stripes folder I used the Chevron (another fav of mine for sure!) and Perfect Polka Dots. Trying to remember if I have ever done that! Stars seemed appropriate for the 4th of July and the Stars Framelits were perfect. The cutouts just needed some texture. I had the larger star "bleed off" (that is a term I learned from my graphic design knowledgeable daughter-in-law) the card. For the sentiment I used the "celebrate" that came with the June My Paper Pumpkin but you could use any simple sentiment. MDS has a simple "celebrate" as part of the Cake & Ice Cream download (130867) and it already has a banner. In MDS you can resize as you wish.

My Paper Pumpkin is a great value if you are interested in receiving a fun project each month that contains all the materials you need to complete a project or if you have limited or no supplies it is a great way to slowly accumulate supplies. You can skip months or cancel your subscription at any time. In addition if you are a subscriber you can purchase some of the prior kits or the refills for many of the prior kits. The refills contain everything except the stamps and ink that came in the original kit. Many times you can use the refill to make the project even though you do not have the exact stamps and ink that came in the original kit. 

In the June kit the project could be done in two different ways and it contained all the supplies for use either way so I had lots of items left over that I could use on other projects. Here is a video showing the kit.


Supplies Used:
  • Stamp Set: June 2014 My Paper Pumpkin
  • Cardstock and DSP: Cherry Cobbler (119685), Night of Navy (00867), Shimmery White (101910), Silver Glimmer (135314)
  • Ink: Night of Navy (126970)
  • Accessories: Regals Candy Dots (130932)
  • Tools: Stars Framelits (133723), Stylish Stripes Embossing Folder (132174), Chevron Embossing Folder (127749), Perfect Polka Dots Embossing Folder (117335), Itty Bitty Accents Punch Pack (133787)


To order click on the ordering tab above just under the header. You can email me privately with any of your papercrafting questions or ask them in a comment below!

I’d love to hear what you think!! I ♥ comments! Leave your thoughts below!

Wednesday, May 14, 2014

Circle Treat Hat


Welcome to the May Pals Blog Hop. This is the first hop on our new day - the 2nd Wednesday of the month. Before we celebrate the release of the new Stampin' Up! catalog next month, we want to take time to say goodbye to our favorite retiring products. This month we are showcasing projects that feature stamps or accessories that are retiring along with the 2013-14 Idea Book & Catalog on June 4.

You may just be starting the blog hop or may have come from Rae Harper at Wild West Paper Arts (http://wildwestpaperarts.com/), stop 12 on the Pals Hop. If you get off track at any time, the full lineup below will help you move along from blog to blog.

One of my favorite embossing folders is the Lattice which is being retired with the current catalog. (To see all the products on the Retired List in the Stampin' Up! store click here. Products are only available while supplies last!)  It can be used in many different ways including embedded embossing in which layers of cardstock are embossed as a unit creating a look resembling quilting - very effective! Another way it can be used is to create a texture resembling woven straw. That is how I used it here on the hat brim which I then combined with ribbon and a Circle Treat cup to create a favor that could be used for lots of different spring events.


I used Midnight Muse cardstock, one of the 2012-2014 InColors, which is retiring at the end of this month. It is my favorite navy color. Another of the retiring InColors that I also love is Summer Starfruit. All of the 2012-2014 InColor cardstock quickly sold out and Stampin' Up! has just announced that they have obtained additional 2012-2014 InColor cardstock in a limited quantity. It is only available while supplies last! All products in these colors are available in the Stampin' Up! store while supplies last here.

I first punched a hole the size of the treat cup in a piece of Midnight Muse cardstock using the 1 3/4 inch circle punch. Punching the center hole first is an important step which will make it much easier to insure that the Circle Treat cup (not retiring! Yay!) is centered on the hat! Next I cut the brim using one of the Starburst Framelits. Just center the punched hole in your Framelit before you cut it. I then embossed the brim with the lattice folder and inserted the Treat cup. I used Sticky Strip to adhere the top of the Treat cup to the embossed cardstock but it did not adhere as well as I hoped. The problem is that, due to the embossing, there are only small limited places on the cardstock that actually touch the Treat cup. In the future I would try a liquid adhesive such as Multi-purpose Liquid Glue although I do not know how well liquid glue will stick to the Treat cup. I decorated the Treat cup with Midnight Muse stitched ribbon (also retiring) using Stricky Strip and added a Shimmery White flower punched out with one of the punches in the Itty Bitty Shapes Punch Pack. I love this little flower and use it regularly on all kinds of projects. It too is being retired and I am very sad to see it go. I snipped down the flower to create petals and added a So Saffron candy dot. I used Sticky Strip to adhere the ribbon to the Treat Cup. (That did work!)  

In order to get the treats out of the cup without destroying the hat I created a "door" on the back of the project from Shimmery White cardstock. I first used the Midnight Muse cardstock for the door but did not like the look with my white treats. I decided they looked better against the Shimmery White. For the "door" first used a 1" circle punch to cut out a circle from a piece of Shimmery White cardstock. I then centered a Circle Framelit over the punched hole and cut out a larger circle piece of a sufficient size to hide the bottom of the Treat cup. I then adhered that piece to the underside of the cardstock and the bottom of the Treat cup. The Treat cup has adhesive on the bottom side and and I used Sticky Strip to adhere the Shimmery White piece to the underside of the "hat". Once again I think I would use a liquid glue in the future. I then punched a 1 3/4" circle out of the Shimmery White for the actual "door". I used Multi-purpose glue and made the "door" removable by applying the glue to both pieces of cardstock and letting it dry completely before placing them together. In this way the "door" can be removed to retrieve a treat and then replaced! I wanted white candy in the cup so I filled it with Shimmer White Sixlets. This candy is available in many one color packages in the baking/cake decorating department of grocery stores, including Walmart. Here is a picture of the underside of the completed project.       


Supplies Used: 

  • Cardstock: Midnight Muse (126843 Retiring); Shimmery White (101910)
  • Accessories: Circle Treat Cup (116802); Midnight Muse 3/8" Stitched Satin Ribbon (126847 Retiring); Subtles Candy Dots (130933);
  • Adhesive: Multi-purpose Adhesive (110755) 
  • Tools: Lattice Embossing Folder (119976 Retiring); Starburst Framelits (132967); Circles Framelits (130911); 1 3/4 Circle Punch (119868); 1" Circle Punch (119868); Itty Bitty Shapes Punch Pack (118309 Retiring)


To order click on the ordering tab above just under the header. You can email me privately with any of your papercrafting questions or ask them in a comment below!


The next stop is Colleen Mollema at Uncanny Crafting, stop 14 on the Pals Blog Hop! Thanks for visiting and I hope to see you next month.


2014mayhop_back 2014mayhop_next


  1. Peggy Noe at Pretty Paper Cards
  2. Patti MacLeith at Papercrafts by Patti
  3. Debbie Pierce at Stampin' Sunshine
  4. Jackie Diediker at Stampin' Jackie
  5. Nancy Gleason at My Stampin Space
  6. Sue Becker at RnR Stamping
  7. Susan Itell at Simple Stampin
  8. Michelle Quinno at Shell's Life
  9. Beth Beard at My little craft blog
  10. Amy Lazzell at Just A Thought...Cards by Amy
  11. Debbie Mageed at Secret Stamper
  12. Rae Harper at Wild West Paper Arts
  13. Katie Ferguson at Cottage Paper
  14. Colleen Mollema at Uncanny Crafting
  15. Natalie Bradley at Natalie Bradley Events
  16. Dawn Tidd at Tiddbits from Dawn
  17. Kerry Willard Bray at Peonies and Paper Chains
  18. Wendy Klein at Doggone Delightful Stampin' 
  19. Marlene Heringer at So Many Toys So Little Time
  20. Diane Roberts at Score at Four and a Quarter
  21. Lynn Kolcun at Stamping With Avery's Owlery
  22. Kelly DeTommaso at Kelly's Creative Corner
  23. Shannon Hokanson at Paper Works by Shannon
  24. Christie Crosby at Stampin' Creativity
  25. Kalyn Shubnell at Stamping Chronicles
  26. Lisa Ann Bernard at Queen B Creations
  27. Michelle Gleeson at StampinMojo
  28. Debra Simonis at Deb's Stampin' Grounds
  29. Nicole Watt at Pixel Maven's Retreat
  30. Mary Fish at Stampin' Pretty
  31. Maxine Conrad at Stamp to the MAX!
  32. Donna Kopenski at Crafty Cardmaker
  33. Angie Blake at Angie's Musings