Friday, April 18, 2014

Easter Cross

The lattice die, which has been around for several years, is a very versatile die. One of the ways it is sometimes used is to create a cross. By using paper snips to cut away the unnecessary sections you are left with a cross shape. I have attached a diagram at the bottom of this post to show you exactly where to cut to create the cross shape from the lattice cut out. I have made several cross cards over the years and this is my most recent. In addition to Easter, such cards can be used for a number of Christian celebrations. 

I love Soho Subway DSP and wanted to use it for this card, which I was making for a specific person. I also wanted to make the cross itself out of Brushed Gold cardstock but the gold did not stand out from the DSP background. After some experimenting I decided that an Early Expresso mat under the gold lattice cross would highlight the cross and solve the problem. Here is the card I made.


For the layer directly under the Soho Subway DPS I used Naturals Ivory cardstock. I really like this cardstock and wish people would use it more frequently. It has a more rustic texture than Very Vanilla and contains small flecks of various colors. It looks really good with this DSP.  Putting the cross in the middle of the card was too predictable so I placed it to the side and balanced it with more of the flowers I used on the cross. I love all these colors and was pleased with the way it turned out. 

I wish a Happy Easter to all my Christian readers!

Supplies Used:

Cardstock and DSP: Crisp Cantaloupe (131298); Early Espresso (119686); Brushed Gold (102935); Naturals Ivory (101849); Soho Subway Designer Series Paper (130140); Birthday Basics Designer Series Paper (on the envelope) (130145)

Tools: Lattice Stampin' Up! Bigz Die (115958); Itty Bitty Shapes Punch Pack (118309); 1/2" Circle Punch (119869)

Accessories: Basic Pearls Jewel Accents (119247)


To order click on the ordering tab above just under the header. You can email me privately with any of your papercrafting questions or ask them in a comment below!
    

Saturday, March 22, 2014

Very Special Baby Boy

Recently I was asked to create a card to accompany a group gift for a baby boy. I didn't have a dedicated baby stamp but as I looked through my stamps I came across the Very Special Someone stamp from the Chalk Talk set. I love the chalkboard look and thought this stamp was perfect for a baby card! Here is the card.


 I realize that the ink color in the photo looks blue (or at least it does on my monitor) but I actually used Basic Gray ink and in real life it does look gray! Black was too harsh and Basic Gray looked more like an actual chalkboard. The blue hound’s-tooth DSP was perfect for a baby boy but I thought it would be nice to soften it a little with a layer of Foil Vellum with the sweet little silver hearts. Since most adhesives will show through the vellum here is a hint to attach the vellum to the DSP. Hide Mini Glue Dots behind some or all of the foil hearts. The Paper Doily was added to create even more baby softness. 

 Supplies Used 

  •  Stamp Set: Chalk Talk (130631 Wood), (130634 Clear Mount), (134800 Digital) 
  •  Cardstock and DSP: Pool Party (131203); Very Vanilla (101650); Etcetera DSP (130129); Fancy Foil Designer Vellum (133364) 
  •  Ink: Basic Gray (126981) 
  •  Tools: 7/8” Scallop Circle punch (129404) 
  •  Accessories: Tea Lace Paper Doilies (129399); Very Vintage Designer Buttons (129327); Natural 5/8” Chevron Ribbon (132982) 

 To order click on the ordering tab above just under the header. You can email me privately with any of your papercrafting questions or ask them in a comment below!


Wednesday, February 12, 2014

Valentine's Day Treats

I always try to encourage healthy eating so I am definitely not the stereotypical grandmother always passing out sweet treats, but for the last couple of years I have been making Valentine’s Day candy treat holders for my granddaughters. This year I remembered having seen Rolo candy holders that looked like a pencil. Even though pencils have nothing to do with Valentine’s Day I thought they were really cute and thought my girls would think so too so I decided to make some for Valentine's Day. Here are the ones I made.


I personalized a couple of them by using the favorite colors of the two that have strong feelings about such things and left the other two yellow. Here is how they were made. 

Cut a piece of card stock 4 3/4” X 3 1/4” in the color you want for the body of the pencil. Score this piece every 1/2” down the length of the piece. This will result in a ¼” piece remaining on the end of the piece. Fold gently along each score make but do not use a bone folder or create a strong crease. Wrap this card stock piece around a package of Rolo candy so that the card stock is even with one end of the candy. There will be a slight overhang on the other end. Adhere the first ½” scored piece on top of the ¼” piece. I found liquid glue to be the most effective for this task. Then cut a piece of card stock 3 ½” X ¾” in the color you want for the eraser. Wrap this piece around the end of the “pencil” that has its edge even with the candy. I used a dry adhesive to attach this piece to the body of the pencil but again used liquid adhesive on the end of the piece to attach it to itself. For the metal band I embossed a piece of tin foil backed by parchment paper using the Square Lattice embossing folder. A piece of Brushed Silver card stock would work just as well. I adhered the piece with liquid glue. I then adhered a Hersey’s Kiss on the other end of the “pencil” with three Glue Dots. The Kiss will be slightly recessed into the “pencil”.  

Once they were made I packaged them in cellophane bags, tied them with a ribbon and attached a cute tag. Presentation is just as important with a gift as it is with food! I then created tags with a Valentine stamped image cut out with a Banners Framelits die and then attached a Glimmer paper hearts. I mounted these to left-over Christmas tags.  


Supplies Used


  • Stamp Set: Delightful Dozen (128547 W, 122652 C, 127597 MDS)
  • Cardstock and DSP: Daffodil Delight (119683), Pink Pirouette (111351), Tempting Turquoise (102067), Rose Red (102544), Whisper White (100730), Silver Glimmer Paper (124005), Red Glimmer (121790) 
  • Ink: Real Red (126949), Melon Mambo (126948)  
  • Tools: Square Lattice Embossing Folder (119976), Banners Framelits Die (132173), Small Heart Punch (117193),  
  • Accessories: Raspberry Ripple Stain Ribbon (126845) 


To order click on the ordering tab above just under the header. You can email me privately with any of your papercrafting questions or ask them in a comment below!

Saturday, February 1, 2014

SALE-A-BRATION Is Here!


Sale-a-bration is Stampin’ Up’s biggest promotion of the year! Between January 28-March 31, for every $50 of Stampin’ Up! product that you purchase, you can choose one free exclusive gift from a choice of thirteen items included in the Sale-a-bration brochure. What exactly are these items? 


First there are four great stamp sets available. Banners are really hot right now and check out the seven cute banners in the Banner Blast set. In addition there is a little star, flower, and heart! These banners are a perfect fit for the Banner Punch (which is also available as a SAB choice) or they can be easily snipped with paper snips.

Petal Parade has fun flowers, greenery, some scallops and a neat feathery chevron.

How cute is the See Ya Later stamp set with four different graphics and really fun sentiment combinations? These combinations can be used individually or together in lots of different ways!

Last is the You’re Lovely set which would make a “lovely” label for a card or other project. Plus it coordinates with the Deco Labels Framelits Dies.

To see all the free items available during the SAB period click on the Sale-A-Bration brochure on the right of this blog. 

Here is a card that I made with the Banner Blast stamp set!


This card was made in honor of my fabulous Stampin’ Up! upline Brian King. This week I found out that Brian had once again been recognized by Stampin’ Up! for the great job he is doing as a Stampin’ Up! demonstrator. Congratulations Brian!! You TOTALLY deserve it! 

I then decided I should make a congratulations card and the Banner Blast set seemed perfect! I looked for a Designer Series Paper to use on the card. DPS is great to use on cards because once you find a paper you automatically have all of your colors! I selected the new Retro Fresh paper that is on page 19 of the Celebrate the Everyday catalog. I LOVE this paper. I love all the fun arrows and the great colors! I thought Brian would like it to. (After all doesn't he have on a Coastal Cabana shirt in his avatar?) I punched out the Banner Blast images with the Banner punch that is also available as a free SAB gift but you could also use some paper snips. 

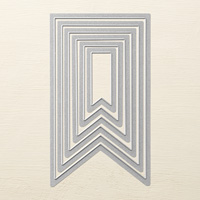
I thought the congratulations sentiment from the Sassy Salutations set went great with the banners. I used the Banners Framelits Dies to create the flags on the sentiment piece. Though my piece is much narrower that the largest Banner Framelit I was able to use the Framelit to create just the flag tip on the sentiment and on the DPS layer under it. You could also create the flags with paper snips.  

Supplies Used:

  • Stamp Set: Banner Blast (133551 wood -133554 clear); Sassy Salutations (132070 wood - 126707 clear)
  • DSP and Cardstock: Retro Fresh Designer Series Paper (132993); Coastal Cabana (131297); Baked Brown Sugar (131296); Tangerine Tango ( 111349); Very Vanilla (124301)
  • Ink: Coastal Cabana (131175); Baked Brown Sugar (131174); Tangerine Tango (126946); So Saffron (126957)
  • Tools: Banner Punch (133519); Banner Framelits (132173)
  • Accessories: Linen thread (104199); Brights Candy Dots (130931)

To order click on the ordering tab just under the header above. You can email me privately with any of your papercrafting questions or ask them in a comment below!


Friday, January 24, 2014

Banners Framelits Video!

Several weeks ago I posted a card I made for the birthday of my wonderful Stampin' Up! upline Brian King. The card contains a crown made using cardstock and Stampin' Up's Champagne Glimmer Paper, which I cut using Stampin' Up's new Banners Framelits. These Framelits are on page 27 of the new Celebrate the Everyday Catalog. (You can see a PDF of this catalog along the right side of this blog.) They are designed for making banners but can be used for many other things. For the crown I made I used the three smallest Framelits. These Framelits coordinate with a new stamp set called Pennant Parade. The Framelits and stamp set are available individually or together in a bundle. Here is a video showing the Framelits and the Pennant Parade stamp set being used on a gift bag but you could just as easily use the same pieces on a card or to decorate a package. 


The Celebrate the Everyday Catalog is full of lots of other fun papercrafting products. Check out the super cute Word Bubble Framelits dies and the coordinating Just Sayin' stamp set on page 36. These would be great on any papercrafting project. If you don't have a demonstrator and would like a hard copy of the Celebrate the Everyday Catalog send me an email and I will get one in the mail to you!

To order click on the ordering tab above just under the header. You can email me  with any of your papercrafting questions or ask them in a comment below!

Monday, January 13, 2014

Quick and Easy New Year Card

I have a great, fast solution for those of you who really wish you had sent holiday cards but had too many constraints on your time during such a busy season. More and more people are waiting until after all the holiday hustle and sending New Year cards - and what could be easier than a New Year card with a My Digital Studio (MDS) template. All you have to do is insert a picture and you are done!! You can send it to Stampin' Up!'s Print Services or print it on your own printer. More information about using MDS is available on my previous blog post Chalkboard Christmas or by clicking on the My Digital Studio tab under my blog header. Here is a card that was made using the Hello New Year Postcard Template.


This template creates a 5X7 double-sided card. The sample pictured is made using Pool Party and Pumpkin Pie "ink" but in MDS these colors can easily be changed to any of Stampin' Up!'s colors. If you think you might like to give MDS a try you can download a trial version, good for 30 days, for free. You can then purchase the Hello New Year Postcard Template (or any of the other available downloads) and create and print projects. After 30 days you can decide whether you want to purchase the software for $19.95. Either way you still own all of the downloads you have purchased. MDS downloads can also be used in other software applications such as Photoshop Express. The Hello New Year Postcard Template can be purchased in the Stampin' Up! store.


To order click on the ordering tab above just under the header.  You can email me with any of your papercrafting questions, including MDS, or ask them in a comment below!

Thursday, January 2, 2014

Happy New Year!


I recently saw a card that used the Stylish Stripes embossing folder with random skinny strips of Silver Glimmer paper. I loved it! What a great idea for any card that calls for bling. I couldn't wait to use it on a card and the New Year seemed like a perfect occasion! When I thought of New Year and silver I also thought of Midnight Muse. Here is the card I made.


I randomly adhered various thicknesses of skinny strips of Silver Glimmer paper into some of the grooves of the stripes. I found that varying thicknesses and random application of the strips made for a more visually pleasing element. (Which is a good thing since, for me, it is almost impossible to cut the strips exactly the same thickness!) While many embossing folders, like Wildflower Meadow, have a clear direction, others, like Chevron have no specific direction or like Square Lattice, have no direction at all. Also, while the look will vary, they generally can be used with either side up. You need to remember this when planning your cards. I had my card basically designed in my head but when I started to assemble the card I discovered a problem. I wanted to make a horizontal card with three party hats and assumed that the stripes would work fine with that design - but when I began to assemble the card with the side I wanted to use up, I noticed that the stripes flowed from the upper left to the lower right. I did not like that look, especially with the addition of the Sliver Glimmer paper.  I wanted the stripes to flow from the lower left to the upper right. I am not clear if it really would make any difference but it did for me! I finally decided I could create the illusion I wanted by using two pieces of embossed Whisper White and cutting the pieces into three sections and splicing the pieces to make one horizontal piece. I used thin strips of Midnight Muse to visually create the three sections and cover my seam. I realized two things after the fact. One, to add a little more bling, I meant to use Shimmery White cardstock instead of Whisper White but got totally distracted by the stripe issue (darn!); and two, I could have cut my finished embossed "piece" into three sections, shave a little off each piece where the sections would join and then mount them to an additional piece of Midnight Muse. That is an idea for next time!

Even in MDS, Stampin' Up! has an extremely limited selection of New Year stamps and none fit with my design so I created an MDS text box that said "Happy New Year!" in a font I liked. I printed it in MidnighttMuse "ink" on Whisper White cardstock.

I have some good news and some bad news for you. First, the good news is that tomorrow is the launch of the new Celebrate the Everyday Occasions catalog. I plan to post a PDF on the right side of my blog once it is available. The catalog contains lots of exciting new stamps, Framelits and accessories that I will be showing you over the next few months. Now the bad news. With the exception of the carryover items (see the carryover PDF on the right of this page), today is the last day to order from the Holiday catalog. This includes the Stylish Stripes embossing folder that I used here and which is not carried over. I really like that folder and find it to be very versatile. If you would like to have it you need to place an order today!

Hope you have a wonderful New Year!!

Supplies Used:

  • Stamp Set: Pennant Parade (Clear-Mount 122742) (Wood 128697)
  • Cardstock: Midnight Muse (126843); Whisper White (100730)
  • Ink: Midnight Muse (126860), Versamark (102283)
  • Tools: Stylish Stripes Embossing Folder (132174); Postage Stamp Punch (122344); Petite Pennants Punch (122361); Owl Punch (118074)
  • Accessories: Clear Embossing Powder (109130); Basic Rhinestones (119246)
  • Font: Viner Hand ITC


To order click on the ordering tab above just under the header or email me if you prefer. You can also email me with any of your papercrafting questions or ask them in a comment below!