Sunday, November 23, 2014

BIG Holiday Sale!!


If you love deals, you're going to love this great sale starting Monday, November 24th, and going through December 2nd! There are going to be doorbusters available only on the first day of the sale, Monday,November 24th, and Monday, December 1st!

In addition, during Online Extravaganza, a few of the past Paper Pumpkin refill kits will be 20% off and available to ALL customers. (Please note that refill kits do not include stamps or ink.) On Monday, two new kits will be added to the existing Paper Pumpkin past kits offering (available to current subscribers only). 

You can download the sale PDF here. (Note that the page numbers of the items are listed in the last column so you can easily find an item to see a picture. Also the Annual Catalog and the Holiday Catalog can be downloaded by clicking on the image of each on the right column of this blog.) Or you can go directly to the store and see each of the items. 

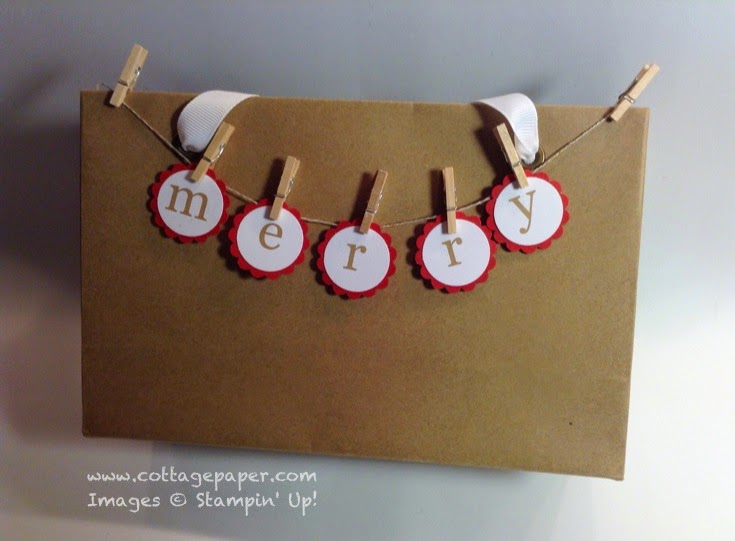
Let me tell you about a couple of my favorites. First today only, Monday November 24, one of the door-busters is the Gift Box Punch Board for 30% off! What a deal! Here are a few boxes that I have made with the board. You can make virtually any size box between 2"X2" and 4"X4". 


Check out this Stampin' Up! Video showing It in action.


Since I already have the Box Board the one item that went to the top of my list was the Chalkboard Banner Kit at 50% off (that's $9.95!!). I had really not noticed that kit until I was checking out all the items on the sale flyer. I don't know how I missed it! I mentioned in an earlier post that sometime in the early part of the new year we are moving to a new cottage and I will have a new project room! I am doing a little planning on how I want to decorate it and I think this Chalkboard Banner spelling out "Cottage Paper" will be perfect!! In addition I have a couple of granddaughters who love chalkboard and teal/turquoise and I think they will be really excited about the pom-poms that come in the kit. I am still trying to decide how many kits I will order! Here is a video showing you all that comes in the Banner Kit.


Some of my other particular favorites which all happen to be 50% off are: 
  • Sweetheart punch - this is a nice sized heart and if you don't have a heart punch remember once Christmas is over Valentines Day will be close behind!
  • Natural 7/8" Cotton Ribbon - I love this ribbon. It has a wonderful feel and is perfect for using on packages any time of year. 
  • Washi tape - I love washi tape and there are three different collections on sale. If you don't have any Washi tape you need to get some and if you do have some you need to get some more! :-)


Plus Yet Another Outstanding Deal

In addition to all the great deals in the sale, if you join Stampin' Up! between November 24th and December 2nd you get the starter kit for 25% off the normally $99 price. The starter kit consists of $125 of Stampin' Up! products of your own choosing. This means that you are getting the product you choose at 40% off of the retail price. Plus if you join Stampin' Up! from November 24th through December 5th, you can get 5% cash back on all your orders in December 2014! There is absolutely NO obligation if you decide to join. Wow! 

Please email me if you want to take advantage of any of these specials or if you have any questions.

Have a great Thanksgiving!! 

Tuesday, November 18, 2014


Holiday Home Gift Bag


Welcome to the November InKing Royalty Blog Hop.  We're excited to share projects that showcase fun gift wrap and packaging ideas for the holidays.

You may have started the Blog Hop here or may have hopped over from Amy Whelan at Amy's Inklings.  After you read my post, I  hope you'll hop over to the next.  If you get off track at any point during the blog hop, there's a complete list of participants at the end of this post.

The Stampin' Up! Holiday Catalog is packed with gift wrapping and packaging ideas and I love it all!! There is wrapping paper; tag kits, stamps and punches; gift boxes and bags. If you have not seen it you can view it by clicking on its image on the right hand side of this blog. You really need to check it out! 

Even with all the wonderful options I wanted to point out another one. Lots of you are familiar with My Paper Pumpkin but maybe have not looked at it closely. Many of the past kits or refills are available to current My Paper Pumpkin subscribers or they can be purchased directly from a demonstrator. One of my favorite kits was the In the Bag Kit from last spring. At 5.5"X8.5" the bags are not large but they will hold many small items. I used some to hold paperback books that I added to Easter Baskets for my granddaughters.  This kit is still available as the original kit or as a refill with all the components except the stamps and ink spot. The kit or the refill includes 5 very cute heavy weight Kraft bags that you can then decorate with all the included components. The refill kit is only $7.95 plus tax and shipping. This comes out to less than $2.00 a bag! I used just the bags from the kit and added images and my own ribbon for a fun holiday gift bag. Here is the bag I created.


I love the Holiday Homes stamp set but after some thought I decided to order the MDS digital version. That is what I used to create this bag. I also love the First Edition Designer Series Paper which retired several years ago. It looks like newsprint or book pages. In addition to the paper I also bought the MDS version. I wanted to "stamp" the houses on it but after some experimentation I decided the newspaper images needed to be fainter so I lowered the opacity (making it more transparent) and then "stamped" the houses on top of the DSP with Basic Gray digital "ink". If you have the stamps you can stamp with Basic Gray ink on Whisper White or Very Vanilla. I frequently use Basic Gray rather than black because I find black too harsh. I then colored the images with Stampin' Up! markers. I also "stamped" the Santa with Basic Gray on Ivory Naturals cardstock. I created the tree by stacking three trees punched with the Tree Punch from a Trim the Tree DSP to make a taller tree and then attached three of these trees to each other make a 3D tree. I then added Brushed Gold stars. For the ribbon I used one of my favorite ribbons -  7/8" Cotton Ribbon. It has a wonderful look and feel! I had some leftover from a previous project that I had stamped with the Dictionary stamp - more of the newsprint/book look!

I also made another quick bag using some of the elements that come in the kit and refill. I used the letters to spell "merry" and backed them with a Real Red scallop circle. I attached them to the twine with the clothes pins that are part of the kit or refill. You could even add another circle layer around the Real Red - maybe using some Glimmer Paper! Hmm, wish I had thought of that sooner.


Supplies Used:

  • Stamp Set: Holiday Home (135095, MDS 138116); Dictionary (130351)
  • Cardstock and DSP: Soft Suede (115318); Naturals Ivory (101849); Trim the Tree (135824); Brushed Gold (102935) 
  • Ink: Many Marvelous Markers (131264); Basic Gray
  • Accessories: 7/8" Cotton Ribbon (127844); In the Bag Kit (135505, Refill (135504)
  • Tools: Itty Bitty Accents Punch Pack (133787)


To order click on the ordering tab above just under the header. You can email me privately with any of your papercrafting questions or ask them in a comment below!

 I comments and would love to hear what you think!!  Leave your thoughts below!

Thank you for stopping by today.  I hope you'll hop along to the next stop on the blog hop (and the blog of my fantastic Upline!), Brian King at Stamp with Brian.  You certainly won't want to miss any of these projects.


  1. Lynn Kolcun at Avery's Owlery
  2. Angie Coleman at Coastal Stamping
  3. Candy Ford at StampCandy
  4. Kelly DeTommaso at Kelly's Creative Corner
  5. Amy Whelan at Amy's Inklings
  6. Katie Ferguson at Cottage Paper
  7. Brian King at Stamp with Brian
  8. Becky Volpp at Ink Blossom with Becky
  9. Pam Morris at Tap Tap Stamp


Sunday, November 9, 2014

Creative Blog Hop

Last week my friend Lynn Kolcun (www.averysowlery.com) tagged me for the Creative Blog Hop. As part of this Hop a participant provides information related to his or her creative process by discussing the following four items.

1. What projects am I currently working on.
While I am always working on cards I also do various other papercrafting projects. Sometime after the first of the year we hope to move into a new cottage and that means a new bigger and better craftroom! I would like to have a wreath for my craftroom door and to be consistent with the rest of the house I wanted it to have a vintage look. I bought a round 14" styrofoam wreath and covered it with 1 1/4" burlap ribbon.  I decided I would put some vintage looking flowers on it and I made a few out of Typeset Designer Series Paper and some out of filter paper. I then sponged the edges of both kinds with Crumb Cake ink. Flowers are very easy to make and I have posted about them in the past. All you need is a punch or die that is basically a circle shape or you can cut them out By hand. It can be a plain circle, a scallop circle, a flower shape or a starburst but uneven edges are the best. You stack layers of your shapes, staple them together and then separate and scrunch the individual layers, and spread them back out.  In my experience they all result in fairly similar flowers. The basic difference in the final flower is the size of the "circle" and the number of layers. The larger the "circle" the more layers are needed for the same result. I have not yet decided how many flowers I will use on my wreath but here are the ones I am starting with. I also plan to add some other items. I have various buttons that I think I will consider using and I am still thinking about other additions.


2. How is my work different from other papercrafters.
Well of course we are all different and have different styles. I like vintage designs like the wreath I am working on but I also like simple & classy and clean & simple though I frequently have to restrain myself. At times I have to resist adding so many details so that I no longer have clean or simple!

3. Why do I create the projects that I do.
I like the creative process and while enjoy the final products produced, many times I just enjoy the process and challenge of creating an item. I also like being able to share projects with others either through my blog or through classes.

4. How my creative process works.
It works in a number of ways. I sometimes look at papercrafting challenges, especially color challenges, even if I am not officially part of the challenge. At times I have certain supplies that I want to use and I challenge myself to use them in a project. Other times I see a specific technique I want to try. My projects involve lots of trial and error and they will go through many variations before completion. I always think about my projects overnight and sometimes over several nights. I almost always come up with changes. I will be thinking about my wreath for at least the next several days. 

As part of this hop bloggers choose another blogger to "tag" and that blogger will then participate with a blog post the next week. When I was asked to participate I knew immediately whose blog I wanted to share with you! I discovered Kim Jolley's blog when she was introduced to a Facebook group of fellow Stampin' Up! demonstrators and along with her name her city and state were listed. I immediately realized she lived in the city where I was born and raised! That connection prompted me to check out her blog and I was very impressed! I have been watching her ever since. She is clearly not just a crafter but a true artist!

Here is what Kim says about herself.

I have been dabbling in rubber stamping and mixed media for 15 years and have been a Stampin' Up! customer the entire time.  I taught rubber stamping and mixed media classes for several years in Springfield, MO at a local store until the owner retired. I have been published in Somerset Studio, Stampers Sampler and Vamp Stamp News and have had the immense honor of being a guest artist at Red Lead in St. Louis with Mary Jo McGraw and P.J. Dutton.  A mixed media piece I created was a top 10 finisher in the 2007 Kirkland's Home search for the Next Great American Artist out of over 1700 entries. (to date, my most exciting art related achievement) I am an insurance agent for my day job and in the past have ran several marathons and half marathons. In my "spare time", I keep busy with my husband of almost 33 years and several wonderful grandchildren. I've been dreaming of being a Stampin' Up! demonstrator for over 10 years and am so happy that I finally took the leap!

Please check out Kim's blog http://stampinartfully.blogspot.com/ and see for yourself. Then check out her post next Monday to see her discussion of how she works.

To order click on the ordering tab above just under the header. You can email me privately with any of your papercrafting questions or ask them in a comment below!

I comments and would love to hear what you think!!  Leave your thoughts below!